Saltbox 16 x 10 Outbuilding Assembly Drawings : Activities To Assess While Putting together A Simple Shed
This way door body would sit flush with walls when it was closed. This creates a larger base, adding stability. Remove the temporary support blocks when you're done attaching the hinges. Patio roofs come in wood, aluminum and even canvas for smaller areas. Can't wait to see what you construct next. Make sure the board is very straight. Take into consideration the style of your home and property. With this configuration, the load is taken directly to the (https://shedconstructionplans.com/12x16-saltbox-shed-plans-blueprints) vertical piece resulting in the vertical mounting screws being in shear. Not only will a good set of diagrams help to guide you to completion of a successful project, they are likely to be required by your local planning commission.
Using a circular saw, construct a shoulder chop and a series of cuts parallel to shoulder, then remove scored lumber with a wide chisel. Use temporary braces to lock frames to floor after plumbing walls with a spirit level. Always work in the direction that is best for the man in the middle, because he will be slowest, dragging an air gun, especially if forced to work backwards. Cut a piece of two-by-eight framing lumber to length as a fascia board. Leave no gaps between components for a professional result. Lay two 2-by-4-inch boards the length of wall together with the 2-inch edges up and ends flush to construct top and bottom plates.
Finish curved trim piece by first cutting the angles on each end, and then sawing curves with a jigsaw and sanding them smooth. Hope you don't have to move (related site) it often and if you do, that you have right motive power. The shed may already rest on the foundation, or be a prefab being placed on a concrete or wooden foundation. Measure and chop siding panels so that seams align over wall studs. Last thing to do on this front wall is to add cripple studs, which are those two short pieces above the header. Make sure you take a look over the rest of diagrams to see alternatives and more projects for your garden.
Flashings are important in controlling moisture in wall assemblies. Hinged doors take up less space and close more tightly and securely. Once the posts are up horizontal stringer boards are placed every 2 feet or so. Double doors on the side and gable end make it easy to access space. Another option is to install doors on both gable-end walls, so that you'll be able to easily reach items from either end of shed. If you don't, you may find that your yard suffers damage from moving the bike back and forth across your lawn. Also, give your local utilities a call too before you put a shovel in the ground and through your phone or cable line.
Drilling through ends of your skids and hammering rebar through skids into ground is an inexpensive way to prevent movement. Proslat gets mounted to every stud as it gets laid on wall which is what makes it strong and why it could hold a lot of weight. Nail a full stud at first location inside each end to secure square, then install other studs at every marked interval. Deck blocks have become a common solution for supporting sheds. It is odd, but it’s something we can live with. This takes the guesswork and remeasuring out of rafters. Don't forget to also factor in walking space.
The load-resisting concepts of vaulted ceiling are completely different. Kids played in the outbuilding while it was being built but now that it’s finished its less of an attraction. Cut all subfloor nails or screws flush with underside of sub floor with reciprocating saw. The ridge must support approximately one-third of weight of roof. Foundations of slabs, deck blocks, gravel pads, plastic, grid, or wooden posts require alternate methods to secure your shed to the ground. The numbered parts go together like a giant puzzle. She is thrilled that her first novel will soon be published. When cantilevering floor joists for any reason, such as chimney chase, walkout bay window, or brick stop.
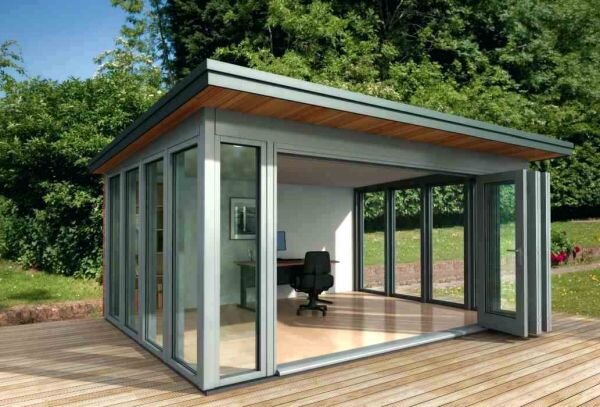
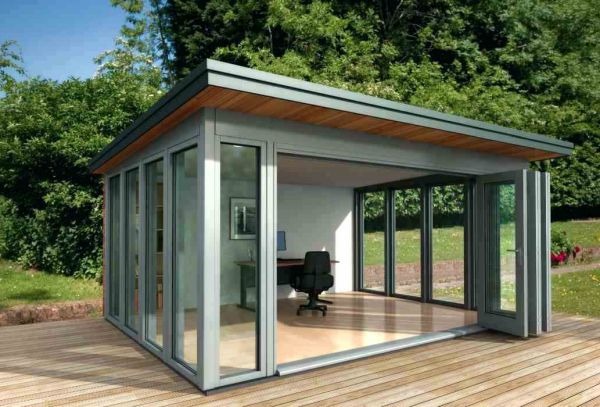
This project was about small storage outbuilding drafts. Cuts for tying to ridge beam and birdsmouth for wall are individually done, and collar ties added. Include additional hangers at ends of each ledger for rim joists. Once you're satisfied with the fit, lay the sample truss on a smooth, flat surface. This is an extremely versatile project, as you can use it even as a smoke house. Here's our guide on how to use pegboard for storage.