20 x 24 Pallet Shed Blueprints : Proper Steps to Build a Storage Shed
The cabinets are suspended on a steel-rail support system, allowing easy installation at any height off the floor, keeping the cabinets dry and underneath easy to clean. The outbuilding roof pictured above shows struts attached to a ridge board. It was nice to finish the wall sheathing and concentrate on the roof sheathing. How high off ground you want the shed to be is also a factor. Column headings refer to ground snow load and width of roof (https://shedconstructionplans.com/4x8-lean-to-shed-plans-blueprints) supported by the cantilever. Drill pilot holes and insert screws into joists of floor. If it is a outbuilding on skids, or beam and joist, or a simple joist floor, process to connect the outbuilding to pad is same.
Cut 1x8 side fascia to length and the clip bottom front corners to meet front fascia. To truly match your cabin's style, most important structural detail is matching roof style and installing eaves. Your engineer or architect could help you determine what material to use for your top and sole plates, which must be wide enough to accommodate two stud widths and a wall cavity. Adding a sand layer increases the cost too. Repeat this process until trench is full. Toe nail the rafters to wall. It has two slopes on each side of the peak. This not only helps to maintain correct distance between posts, but also aligns post sides.
Drive a bolt firmly into each hole by striking tapered head with a hammer. Building the front wall of the outbuilding is a simple task, if you pay attention to several (over at this website) aspects. Boards of size 2x4 inch are suitable especially to lightweight truss if you are able to design and fabricate bracing, as well as member connections. The hinges are just screwed flat onto the wood. Oh well it looks much nicer now. Hang door, then sheathe and side shed-it's much easier to do those steps now than after roof is on. You are not limited by size when you want to frame a recess into a wall.
Nail the wall to the floor and ceiling studs or blocking. Using undersized girders and spacing them too far apart won't support a heavy snowfall, regardless of the roof slope. To assemble the walls, place cross supports on a flat surface, bore pilot holes, and attach the cross supports to the posts. On a sloping lot this may entail cutting some bottom edges of the skirting boards at an angle. No one ever said you had to spend a fortune to protect yourself from would-be thieves, you just have to be smart in how you go about it. You'll just need to add posts and attach shed, which would now be set on a sturdy foundation.
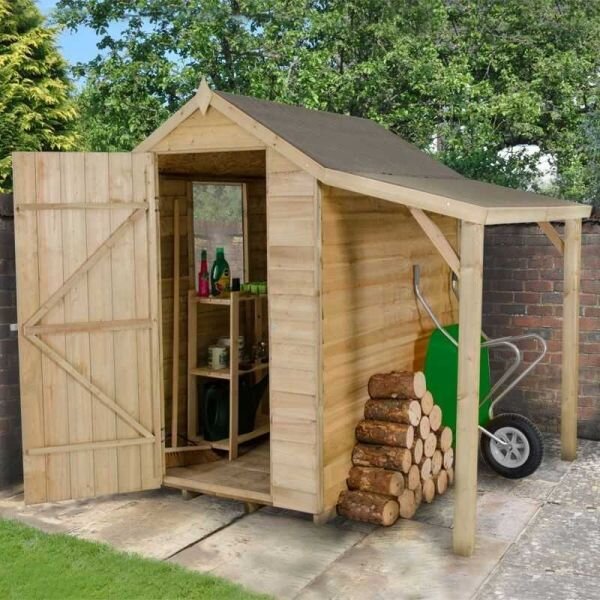
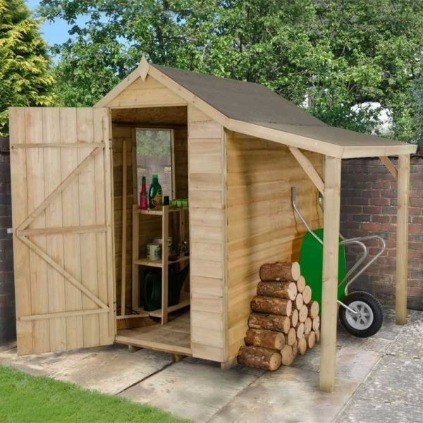
The lean-to garden tool shed shown is easy to build and takes clutter out of your garage. Many people have different ideas on how a outbuilding base should be made. First nail them to ridge board. Nail through top plate and into wall members, then secure bottom plate. Many steel box sheds have a timber floor attached to braces. Keep in mind that more work involved, the greater the need to ensure you have all the necessary permits. Also, if you wish to use pallets for your floor or roof you will need to calculate in those extras, too. Building a storage shed is a great way to increase storage space, but it's a big job, involving significant investments of weekend time or hard-earned vacation days.
If you've built a deck or other large construction project, you shouldn't have any trouble with this shed. Cut bottom rafter end as shown on illustration above. Installing roof trusses is simpler than traditional framing, but there is less room for error. The outbuilding walls are built on the frame, and entire weight of building is transferred directly to ground. This means that the wall studs on floor above will be directly over wall studs on floor below, even though horizontal wall plates, floor trusses and subfloor materials separate walls. Fill the holes with lumber putty, using a palette knife and let compound to dry out for several hours.
To keep water from pooling at these inside corners, Tom rips 2x4s lengthwise on a 45-degree bevel with a table saw. Start by building the front and rear walls of main shed. Angle the nails so the go through joist and into the frame. In carpentry a little planning goes a long way towards greater efficiency, not to mention your poor aching back.